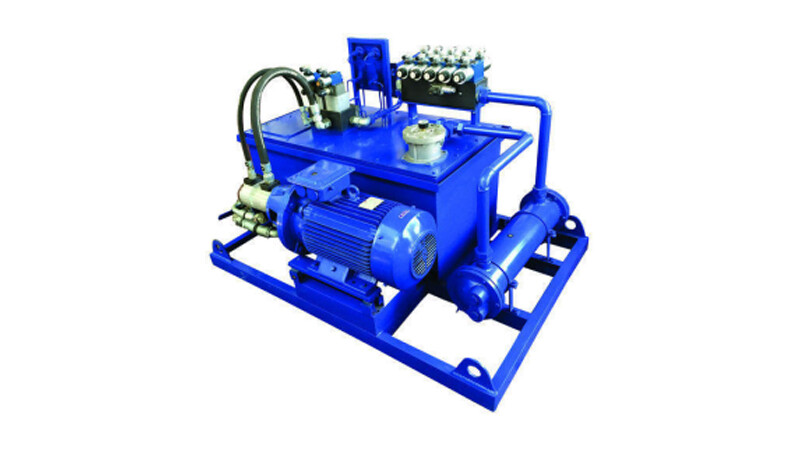
4KW/9-Channel Hydraulic Station Testing Guide
Hydraulic Station Testing Steps
1. Power On: Turn on the power to start the motor.
2. Main Pressure Adjustment: Hold the No. 1 relief valve spool and watch the main pressure gauge, ensuring it reads 8-10 MPa. If not, adjust the relief valve handle clockwise to increase pressure or counterclockwise to decrease pressure.
3. Activate Directional Valves: Sequentially turn on the 1-9 electromagnetic directional valves. Once energized, oil will flow to the AB port, filling the cylinder with oil and causing it to operate normally. Note that longer oil pipes may delay cylinder action.
4. Flow Control: Rotate the No. 4 knob to control the flow and adjust the cylinder speed. Clockwise rotation slows down the cylinder, and counterclockwise rotation speeds it up. Alternate the top of the No. 2 solenoid valve spool back and forth before adjusting the throttle valve to ensure smooth operation.
5. Pressure Adjustment: Factory settings have each circuit pressure at 7 MPa. If adjustments are needed, rotate the No. 3 knob clockwise to increase pressure or counterclockwise to decrease pressure. Pressure adjustments should be done with the cylinder fully extended or retracted to show accurate readings.

Hydraulic Station Diagnostics
(1) No Cylinder Movement:
Solution: Check if the cylinder is full of oil. Run the cylinder back and forth a few times to expel air and initiate movement.
(2) One-Way Cylinder Action:
Solution: Check if the solenoid valve spool is properly energized and creating normal suction. If it is, ensure the relief valve is also energized. Verify that the top of the spool is adequately positioned with a 2mm elasticity, indicating that the solenoid valve is not stuck. Inspect the throttle valve to ensure it is not restricted; it should be open before and after the throttle valve for normal operation. Observe the pressure regulation—pressure will be displayed when the cylinder is fully extended or retracted, but not in the middle position. Adjust the No. 3 knob as necessary: turn clockwise to increase the pressure or counterclockwise to decrease it.
(3) Motor Clamping Issues:
Solution: Check if the solenoid valve spool is properly energized and creating normal suction. If it is, ensure the relief valve is also energized. Verify that the top of the spool is adequately positioned with sufficient depth, indicating that the solenoid valve is not stuck. Inspect the throttle valve to ensure it is not restricted; it should be open before and after the valve for normal operation. Observe if the motor is showing pressure. If there is no pressure, adjust the No. 3 knob as necessary: turn clockwise to increase the pressure or counterclockwise to decrease it. The motor should reach a pressure of 7-8 MPa to operate. If the pressure shows 8 MPa but the throttle valve is not fully open, ensure that the No. 1 solenoid relief valve is energized. Alternate the energization of the solenoid directional valve left and right a few times to ensure proper operation. Once the hydraulic motor reaches the correct pressure and the solenoid valve is not stuck, the motor should operate normally.
(4) Cross-Channel Actions (activating one channel also causes action in another channel):
Solution: If activating one channel also causes action in another channel (indicative of a stuck valve), alternate the top position of the electromagnetic directional valve spool back and forth. Check if the spool reaches the correct depth and has a slight elasticity of about 1 mm when in place. If the spool can normally achieve suction, it indicates proper function. If impurities have entered the solenoid valve, it can cause the valve to stick and fail to create suction. This issue, known as valve sticking or coil damage, requires cleaning. Unscrew the four screws to remove the solenoid valve and clean it thoroughly. Ensure the spool moves freely back and forth within the valve body. If it feels stiff, use fine sandpaper to smooth it and then clean with compressed air before reassembling.
(5) Stuck Valve with Pressure Indication:
Solution: Manually move the spool or clean the solenoid valve to remove impurities. Ensure the spool moves freely.
By following these steps and solutions, you can ensure the proper testing and operation of the ZMDE 4KW/9-channel Hydraulic Station. Regular maintenance and adherence to these instructions will help maintain optimal performance and longevity of the equipment.


