

Безопасность сварки: Достижение высококачественных сварных швов - как очистить и предотвратить образование брызг в сопле Вашей MIG горелки (WeldSafe Essentials 21)
Spatter buildup is one of the most consistently ignored maintenance problems in MIG/MAG welding. It’s easy to dismiss as cosmetic. It isn’t. Once spatter accumulates inside the torch nozzle, it directly disrupts shielding gas flow — and a compromised gas envelope means porosity, oxidation, and inconsistent fusion, even if every other parameter is dialed in correctly.
In this issue of WeldSafe Essentials, we walk through why spatter accumulates, what it actually does to weld quality, and the correct way to clean it — including the one mistake we see constantly on the shop floor that quietly shortens torch service life.
Why Spatter Builds Up (And Why It Matters)
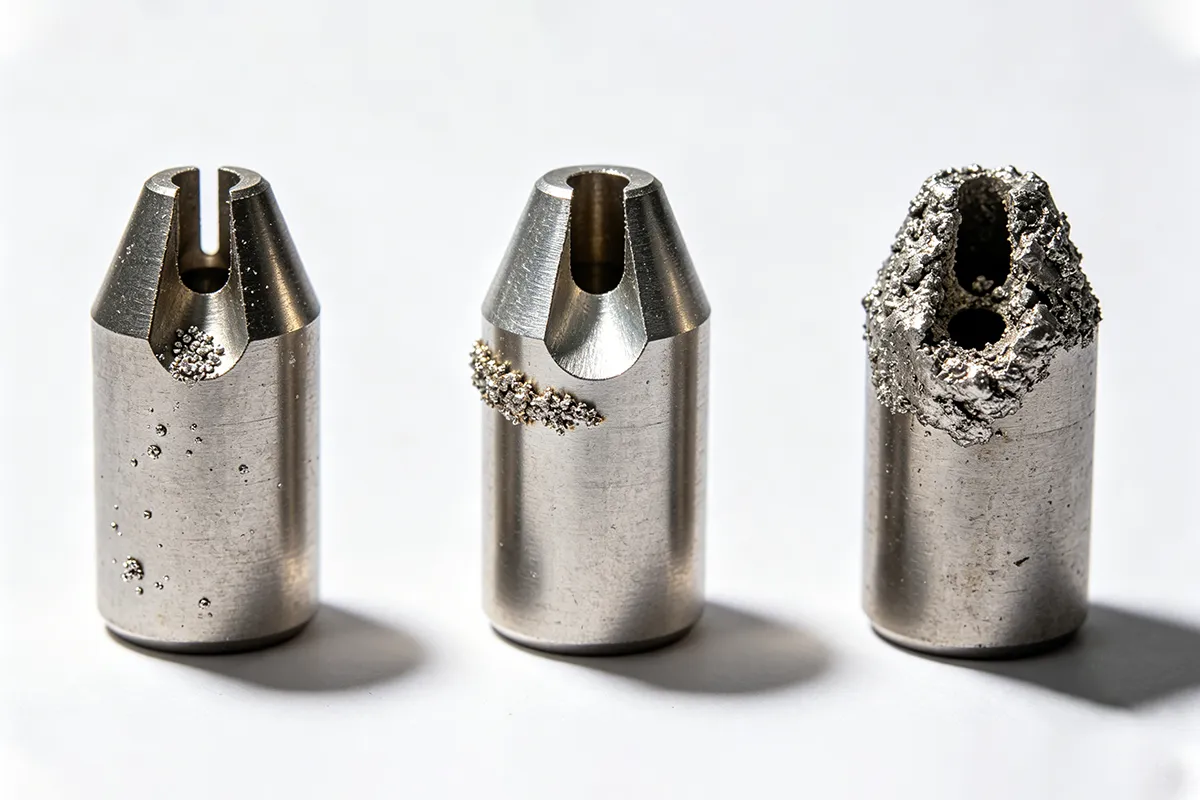
During MIG/MAG welding, molten metal droplets transfer across the arc. Most of them land on the weld pool as intended. Some don’t. The ones that miss land on the surrounding base metal, on the contact tip, and — over time — on the inner wall of the nozzle.
The problem compounds with each pass. A thin initial layer attracts more buildup. Once enough spatter accumulates inside the nozzle bore, the shielding gas stream gets turbulent or restricted. At that point, you’re no longer delivering consistent gas coverage to the arc zone — you’re just going through the motions.
The practical effects:
- Porosity in the weld:Atmospheric nitrogen and oxygen reach the molten pool.
- Inconsistent bead profile:Arc instability caused by disrupted gas coverage shows up as irregular beads.
- Increased tip wear:Spatter bridges between the nozzle wall and contact tip, causing premature tip failure and occasional shorts.
- Reduced nozzle service life:Accumulated spatter accelerates erosion of the nozzle bore and insulating sleeve.
None of these are dramatic failures. They’re the kind of degradation that happens gradually — which is exactly why spatter maintenance gets skipped until something is visibly wrong.
Correct Cleaning Procedure
Step 1: Use the Right Tools
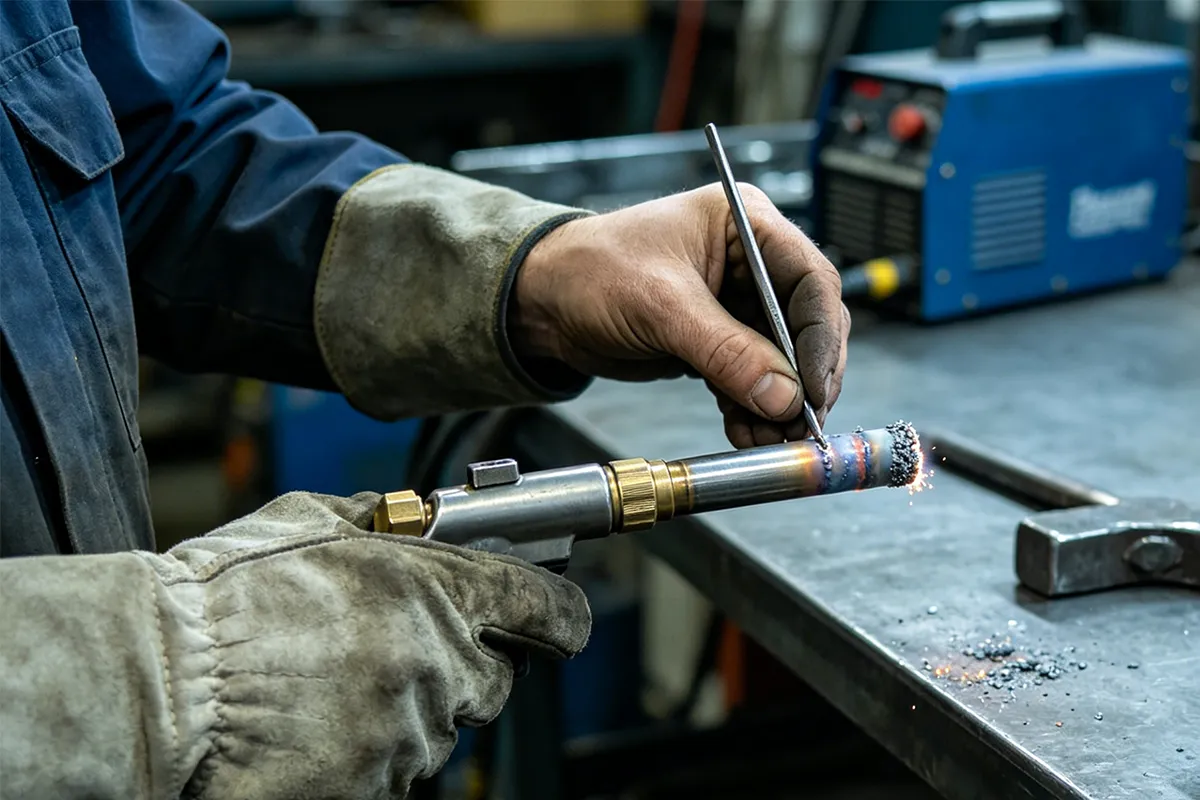
The correct approach is mechanical removal with a purpose-built spatter cleaning tool — typically a flat scraper or a reamer designed for the nozzle bore diameter. Some welders use a wire brush. Both work. The goal is controlled removal without applying impact force to the torch body.
Step 2: Clean Regularly, Not Reactively
Don’t wait until spatter is visibly blocking the nozzle. Build cleaning into your workflow:
- On production lines:Clean the nozzle every 2–3 hours of arc time, or sooner if you’re running high-amperage passes that generate heavy spatter.
- On intermittent work:Check the nozzle at the start of each shift. If you can see spatter buildup past the contact tip, clean before welding.
- After positional welding:Overhead and vertical welding increases spatter adhesion rates. Make it a habit to clean after positional work.
Step 3: Apply Anti-Spatter Compound
Before returning to production, apply a thin coat of anti-spatter compound to the nozzle interior — either a liquid spray or paste formula, depending on what’s available on your floor.
Anti-spatter compounds do two things:
- They create a non-stick surface that prevents new spatter from bonding to the nozzle wall.
- They make the next cleaning cycle faster and less abrasive, which extends nozzle life.
A light application before the shift starts is enough. Excess compound can contaminate the weld area or foul the contact tip.
The One Mistake to Avoid
⚠️ Do not knock the nozzle against the workpiece or the welding table to clear spatter.
This is extremely common, and it causes real damage. The torch nozzle is held in place by the insulating liner and the locking mechanism at the torch neck. Impact force — even from what feels like a routine tap — can crack the insulating sleeve, loosen the nozzle seating, or bend the torch neck over time. None of these failures are immediately obvious. They show up later as gas leaks, contact tip misalignment, or arc instability that’s frustratingly difficult to trace back to a cause.
The five seconds it takes to use a proper scraper is not optional. It’s the difference between a torch that lasts a season and one that needs replacement after a few months.
Spatter Cleaning Quick Reference
| Situation | Recommended Action |
| Light buildup (early stage) | Wipe interior with anti-spatter spray before it adheres further |
| Moderate buildup (visible layers) | Scrape mechanically with nozzle reamer or flat tool, then apply anti-spatter |
| Heavy buildup (restricted bore) | Full mechanical cleaning; inspect contact tip and insulating sleeve for damage |
| After high-amperage passes | Clean nozzle and check tip condition before continuing |
| End of shift | Clean nozzle, apply anti-spatter coat, inspect for wear before next use |
Choosing the Right Anti-Spatter Product
Not all anti-spatter compounds are created equal. A few things to check before committing to a product for production use:
- Silicone-free formulas:If your parts will be painted or coated after welding, silicone-based anti-spatter compounds can cause adhesion failures downstream. Use a silicone-free product for any assembly that goes to finishing.
- Temperature rating:Confirm the product is rated for your operating amperage range. Low-rated compounds burn off quickly at higher heat and provide little protection.
- Nozzle material compatibility:Some aggressive compounds can degrade copper alloy nozzles over time. Check the product data sheet against your nozzle material.
On our production floor at ZMDE, we run a silicone-free spray formula on all MIG/MAG torches. It’s a minor consumable cost per shift, and it demonstrably extends both nozzle and tip service life — the math on consumable savings alone justifies it.

Maintenance Schedule Summary
| Maintenance Item | Частота | Примечания |
| Nozzle interior cleaning | Every 2–3 hours of arc time | Increase frequency for high-spatter applications |
| Anti-spatter application | Before each shift / after each cleaning | Use silicone-free formula for painted assemblies |
| Contact tip inspection | Every 4–6 hours or when arc behavior changes | Replace when bore is visibly worn or elongated |
| Insulating sleeve check | Еженедельник | Inspect for cracks, discoloration, or looseness |
| Full torch inspection | Ежемесячно | Check neck, cable, and connections for wear or damage |
Conclusion: Spatter Cleaning Is Weld Quality Control
Torch maintenance doesn’t feel like part of weld quality — but it is. The shielding gas envelope is what keeps the arc environment clean. Once the nozzle is compromised, you’re no longer in control of that environment, regardless of how well you’ve set your other parameters.
Fifteen minutes of preventive cleaning per shift will do more for consistent weld quality than chasing voltage and wire speed settings that were already correct to begin with.
What’s your current nozzle cleaning routine — and how often does spatter buildup actually cause problems on your line? Share in the comments.
Ознакомьтесь с другими материалами из серии WeldSafe Essentials, чтобы узнать о практической безопасности сварки и оптимизации процессов от ZMDE.
Tags: MIG Torch Maintenance, Welding Nozzle, Spatter Removal, Anti-Spatter, MIG Welding, Torch Cleaning, Welding Consumables, Welding Safety, WeldSafe Essentials